Holly Leaf Drawing: in 6 Easy Steps for Kids
Hello, fellow artists! Are you ready to embark on an enchanting drawing journey?
Today, we will delve into the world of drawing as we learn how to sketch something truly marvellous: holly leaf! These vibrant green leaves seem straight out of a fairy tale forest, and we will master the art of drawing them together, one step at a time.
Just imagine a plant that adores the winter season so much that it adorns itself in its fanciest green attire. That’s holly for you! And here’s the best part – it plays a special role in Christmas festivities, adding a pop of green and red to make everything more merry and bright. But let’s not forget Holly’s trusty companions: the berries.
We’ll carefully place small circles or ovals near our leaves to make them even more stunning. Just picture it – the red berries peeking out, elevating the vibrancy of the green leaf. So, grab some paper, markers and coloured pencils, because our magical drawing journey starts here.
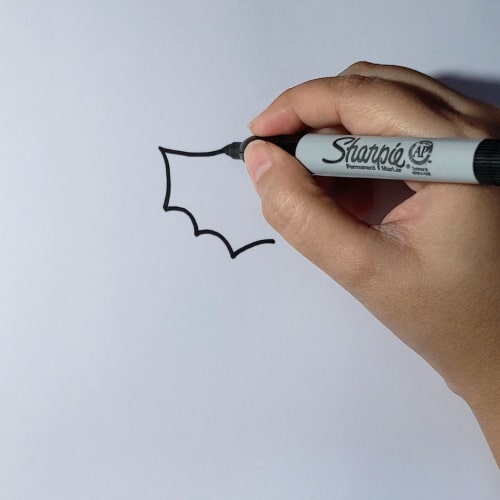
Step 1: Sketching the pointy leaves
To begin with Holly Leaf Drawing, Grab your marker and draw several curvy lines on either side and join them together making a pointed sharp peak, that would like an upside down ‘V’ shape. This is the outline you just drew. It will be the same for all leaves. Next, draw a line in the middle of the leaf and draw some straight lines emerging from both sides of the straight line towards the outside.
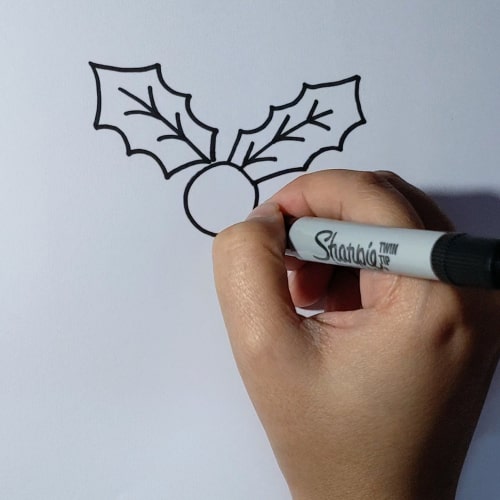
Step 2: Adding Berry to our ‘Holly Leaf Drawing’
When you finish making the first leaf, follow the same process just the opposite side and make another leaf. Make these two leaves look like they are heading towards a different direction. After finishing the two leaves you might be excited to draw the beautiful berries. Let’s do that.Here, we add a rounded shape for our berry. We will repeat it for the remaining berries. Simple step, right?
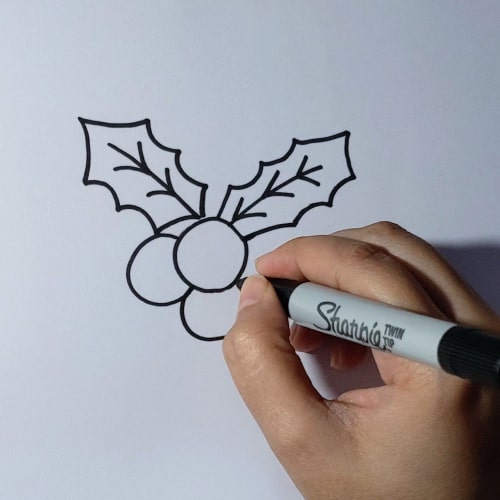
Step 3: Adding more Berries
In this step, we add two more rounded shapes to make our ‘Holly Leaf Drawing‘ more clear. But this time, draw two of the berries behind the first berry we drew in Step 2. To do that, make a shape that is similar to ‘3’ and join both sides to the first berry we made earlier.
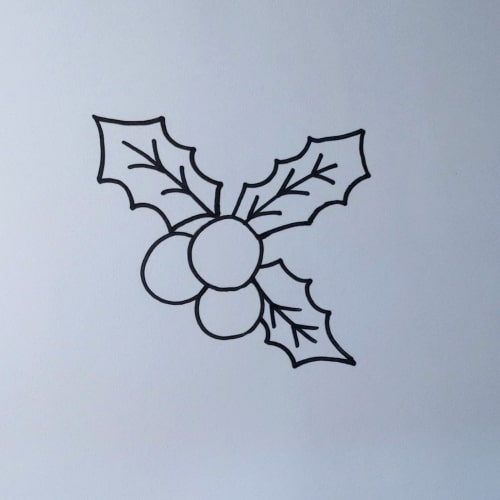
Step 4: Outlining the ‘Holly Leaf Drawing’
Once we are done with our berries, you might want to add one more leaf. Please repeat the same process and make another leaf that looks the same.
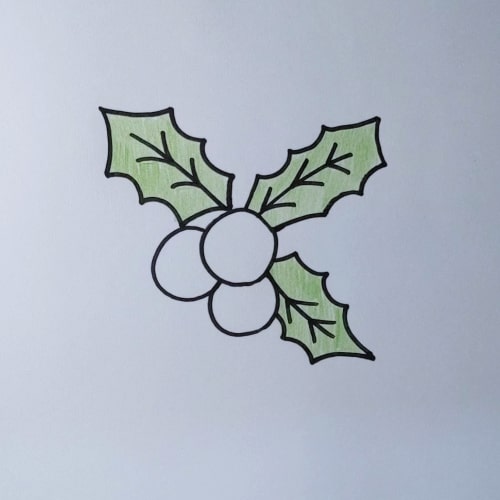
Step 5: Putting Colours in our picture
In Step 5, we start colouring the leaves first. Take a lighter shade of green and start filling inside the leaves. It will make your picture vibrant.
We have come to the end of our drawing. It has already taken its shape.
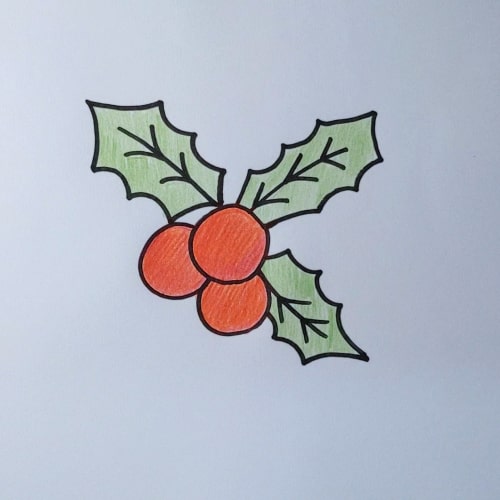
Step 6: Coloring Berries
You have done great so far. It is the last step of our drawing. Take a red colour pencil and fill the berries with it. This juicy red colour will add the famous Christmas vibrancy to our picture.
Congratulations! It is done. You have learned how to make “Holly Leaf Drawing” easily.
I hope you liked our step-by-step tutorial and understood how to draw them easily.
There’s our link given below if you still need any help with the drawing:
Thank You So Much. Keep Drawing. Have fun.
Follow our YouTube Channel for more such videos
