Hello, young artists
Today we will learn how to Draw Easy Heart for Kids. But today’s heart will not be such as on greeting cards it will be a human heart, a fascinating organ located in our bodies and working every single moment to keep us alive.
Drawing human hearts can seem challenging at the beginning, but we have prepared a step-by-step tutorial and divided it into several easy-to-draw parts. With our help, you will create a beautiful and educational Heart Drawing for Kids which is both entertaining and informative.
In my tutorial, I used a Sharpie marker to draw outlines and acrylic markers for coloring. Of course, you don’t have to have these materials. Any other tools (crayons, colored pencils, sketch pens, markers) will suit for drawing and coloring as well. Just remember to enjoy drawing and learn something new with our tutorial.
Let’s get to drawing right now.
Materials needed
Only three materials you will need for this tutorial:
Sharpie marker (or any black marker)
Acrylic markers for coloring
Drawing paper
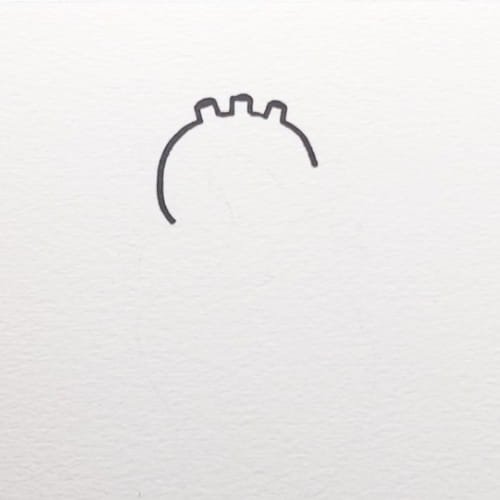
Step 1: Get Ready to Draw the Heart for Kids
The first thing you need to do when starting your Heart Drawing for Kids is to draw an inverted “U”. You will have to add three rectangular shapes on top, which will be the main blood vessels of the human heart.
The lines should be soft since we are going to draw other elements in the second step.
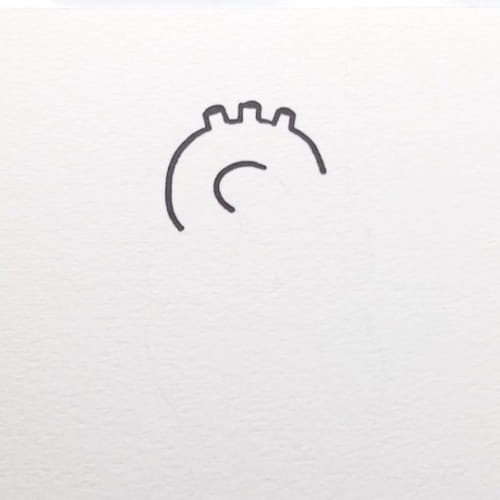
Step 2: Draw the Main Artery
Draw a curved line inside the element resembling the letter C. Then extend this line upward and to the right to make a large artery. Finally, draw a small circle ending it.
This element will make your Heart Drawing for Kids look real. Draw the curves softly.
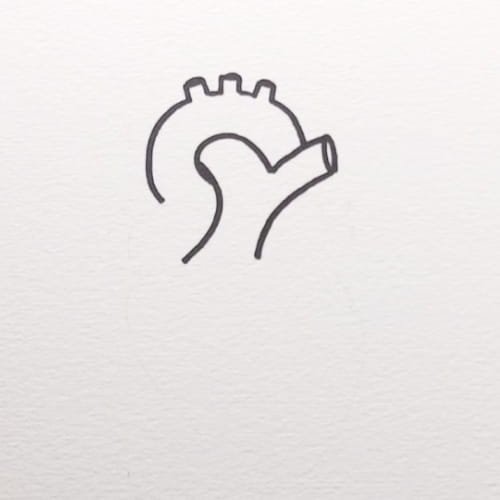
Step 3: Keep Making Your Heart Drawing for Kids
Now continue making two curved lines going downward from the large artery that you have drawn. This will be the center of your heart drawing for kids. Remember to make your lines wide since these will later attach to your heart. Follow the image and you will be good to go.
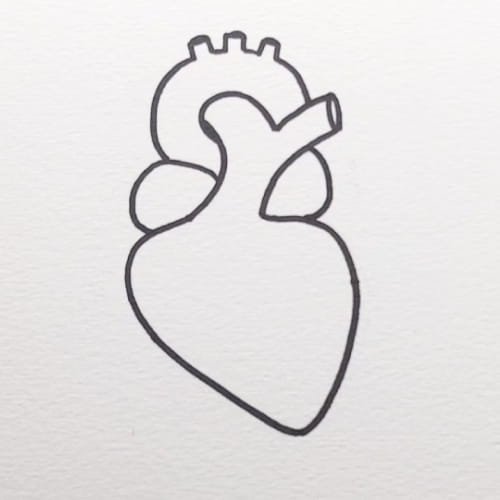
Step 4: Draw the Main Heart Shape
In the next step, draw one small oval shaped chamber at the left side of the heart. And then draw one large curved line to make the big lower part of your heart. Attach the line into the center of the heart.
You now have something that resembles a real heart.
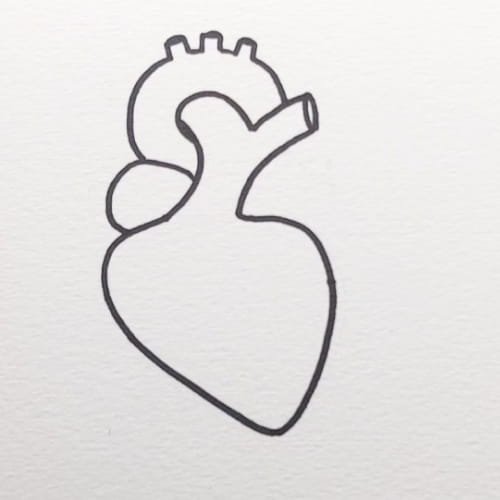
Step 5: Chambers added in the Heart Drawing
Draw another small oval on the right hand side like you did on the left. Next draw three little tubes on both sides of the heart next to the ovals.
Take some time to review your drawing. You have finished the outline of your Heart Drawing for Kids.
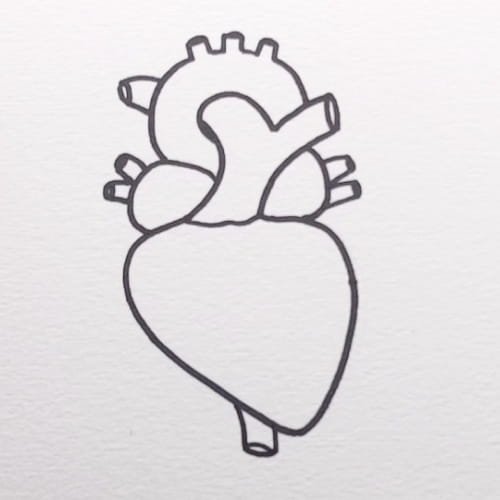
Step 6: Details added in the Drawing
To finish off your Heart Drawing for Kids, draw the tiny blood vessels that you left out. You can draw the short vessels behind both side chambers and the short vessel at the bottom of the heart.
It is time to review your Heart Drawing for Kids. Trace over all light pencil marks to ensure that all of the lines in your drawing are dark and clear. Your line drawing is now finished, and the exciting part is coming next, which is coloring.
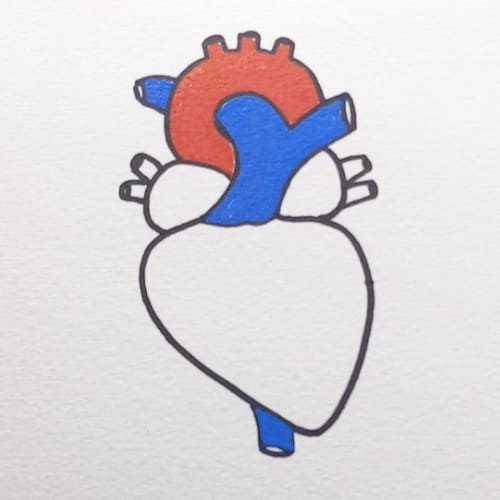
Step 7: Add Colors to the Major Arteries in the Heart Drawing for Kids
It is time to give your Heart Drawing for Kids some color. Take a red marker and color the top portion of the heart along with a blue marker for the large artery passing through the center. Keep the rest of the heart untouched for the moment because in the following step, you will be able to color the other areas more efficiently by coloring one area at a time.
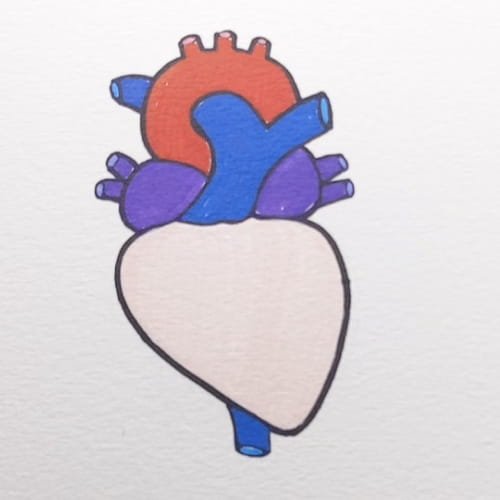
Step 8: Add Some More Colors to Your Heart Drawing for Kids
Color the two side chambers in a purple color while filling the entire heart with a cream or light pink color. Bright colors will make it easier for you to identify the different parts of your Heart Drawing for Kids.
Step 9: Finish Off Your Heart Drawing for Kids
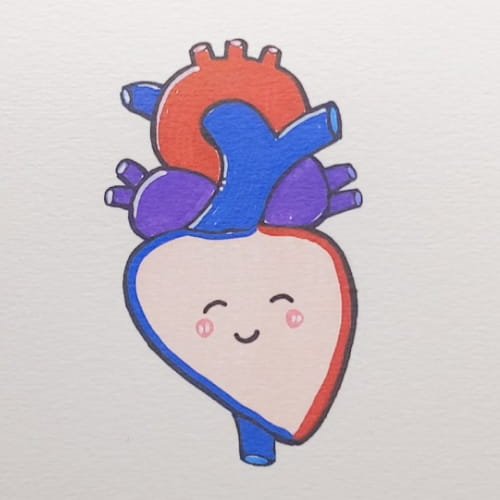
Just one more step to go, and you’ll be done! Draw a sweet little face with curved eyes and a little smile to add a nice touch to your drawing. Add some pink cheeks and darken the outlines if you need to bring out the colors. Yaaaayyyy! Congratulations!! You’ve completed your Heart Drawing for Kids.
Why Children Love to Draw the Heart
The Heart Drawing for Kids is a fabulous blend of art and science. The children learn about the structure of the human heart while developing basic skills of drawing and coloring carefully.
In addition, it helps develop the skills of observing, coordination between hand and eye, and imagination. It can be a fun educational activity at home, school, or science projects.
Conclusion
If you liked our Easy Heart Drawing for Kids lesson, don’t stop here! We have lots more simple drawing lessons for kids for you. Check out : Trophy Drawing for Kids Blog if you are a beginner or new here.
Watch More Kids’ Drawing and Coloring Videos on YouTube
Check out our YouTube channel for more easy-to-follow drawing and coloring tutorials for kids : https://www.youtube.com/@ohparrot1121/videos