Cute Puppy Drawing: Step by step guide for Kids
Hey there, young artists! Get ready for a paws-itively awesome adventure where we will learn how to draw the cutest, most cuddly puppy ever! This step-by-step guide is your ticket to creating a furry friend Cute Puppy Drawing, that will wag its way into your heart and onto your paper.
With this easy guide, Cute Puppy Drawing will be as fun as playing fetch in a sunny park.
Remember – if you find any difficulties while making ” Cute Puppy Drawing ” you can always follow along with the video tutorial we have made for just you. Click on the link below
So, without further delay, let’s begin the fun of drawing together!

Here are the Amazing Guidelines for Cute Puppy Drawing
Step 1: Sketching the Puppy’s Head
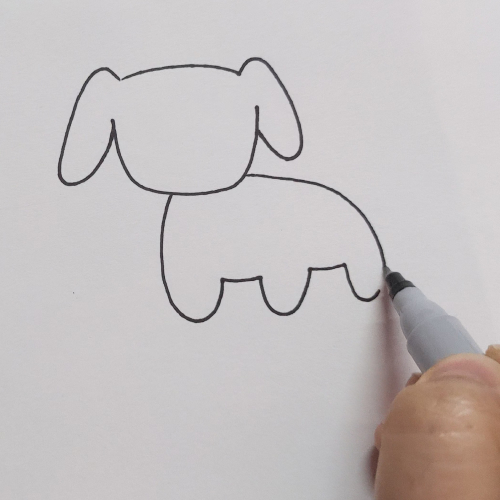
Let’s kick off our puppy drawing adventure by creating the head. Start by drawing a slightly curved line at the top, like a gentle arch. This line will form the top of our puppy’s head, giving it a cozy shape.
Next, sketch a slightly rounded shape, like a circle that’s a bit flattened at the bottom. This shape forms the outline of the jaw of our puppy.
Remember to leave two small gaps, one on each side near the bottom. These spaces will be where we add those cute, floppy ears later on.

Step 2: Adding the Puppy’s Ears
Time to give our puppy some adorable ears! Starting from the gaps we left on each side of the head, draw two floppy, curved shapes. These shapes are like long, droopy triangles, hanging down a bit.
Imagine these ears as soft and fluffy, just like your puppy’s favorite cuddly toys! They might look a bit like the ears of street dogs, but that’s what makes our puppy unique and oh-so-cute

Step 3: Drawing the Puppy’s Legs
Let’s add some irresistibly cute legs to our puppy! Draw small, curved lines extending from the bottom of the head and body. These lines are like tiny “U” shapes or curved lines, resembling cozy socks or gentle arcs.
Imagine these legs as adorable, short curves, making our puppy look playful and cuddly!

Step 4: Adding the Puppy’s Tail
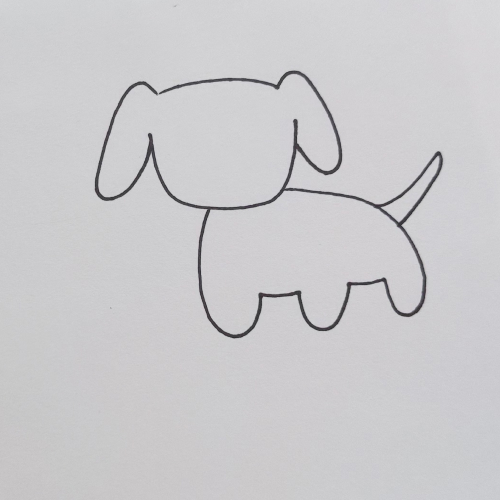
Here we add a tail. Draw a small, elongated shape extending from the back of the body. This shape is like a slender, outward-pointing curve, giving our puppy a playful tail.
Imagine it as a small, wagging tail, ready to show just how happy and excited our puppy is!
Great job! Our puppy is almost ready to play.

Step 5: Creating the Puppy’s Eyes
Let’s make our puppy’s expression come to life! Draw two large, oval shapes near the top of the head. These shapes are the puppy’s eyes, like two shiny buttons.
Inside each eye, draw smaller circles—these are the pupils. Pupils are like tiny dots that give our puppy its curious and lively look.
Wow, our puppy is starting to show its personality with those expressive eyes!

Step 6: Drawing the Puppy’s Nose
At this point, we are going to add a small nose to our Cute Puppy Drawing. Here we draw an oval shape in the middle of the face.
You can outline the nose or fill it in gently with your marker—whatever you prefer! Imagine it as a tiny, adorable button on our puppy’s face.
Our puppy is becoming more adorable at the moment!

Step 7: Creating the Puppy’s Mouth
To complete our puppy’s expression, draw an upside-down “Y” shape hanging from the bottom of its nose. This “Y” shape will form the puppy’s mouth, adding extra charm to our furry friend’s face.
Great job, artists! We have successfully completed our Cute Puppy Drawing. How does your adorable puppy look now? If you have any more details or questions, feel free to ask.
We have provided the link to our YouTube channel- Oh Parrot below. Feel free to visit.
