How to Draw a Burger| 5 Easy and Simple Guidelines for Kids
We will follow the step-by-step directions provided in this post to learn how to draw a burger on a paper in this blog. Did you like burgers? Fillings including meat, vegetables, lettuce, cheese, and other ingredients are layered between two buns to create a burger. Kids like hamburgers, regardless of the occasion or location, we are certain of it.
Both ordering them personally and eating out are enjoyable to them. The names of the foods that children enjoy eating may be taught to them through food sketching tutorials.
With following to these guidelines, kids may effectively illustrate every burger layer, ensuring an original appearance. The best technique to help kids improve their drawing skills is to teach them how to draw a burger. This will help them recognize various forms and patterns.
Let’s Get Started- How to Draw a Burger
Here are 5 step-by-step instruction on burger drawing for kids are mentioned below.
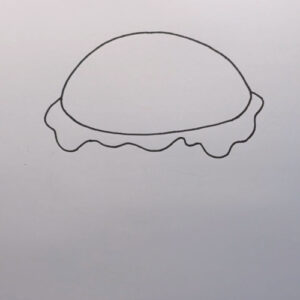
Step 1: Sketch the Layers of Your Burger
Starting from the top, we will create layers one by one. You may experiment with different layering to make burger art that is suitably based, such as vegan or meat.
We shall start this drawing by sketching a semi circle with rounded bottom for top bun. Now add the lettuce, below your bun, add lettuce as one of the layer. Simply draw a leaf like structure that is made of wavy lines. Here the top of the lettuces was drew to overlap the bottom of the bun.
Step 2: Add the Next Layer, with Tomato and Cheese
Next, below your lettuce layer, draw the edges of the two sliced tomatoes. Just sketch the two half circle, i.e, front side of the sliced tomato.
After completion of all these steps, add the sliced cheese. Draw a curved rectangular shape structure below the tomato layer.

Step 3: Add the Patty and the Bottom Layer
Now, in this guide on how to draw a burger, we shall sketch a rounded rectangle for the patty but the edges of the patty should be wavy. As we are creating a hamburger drawing, we shaped our patty accordingly.

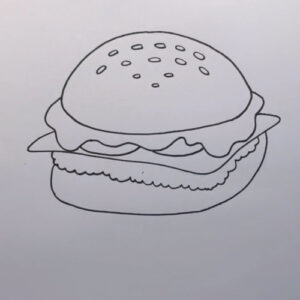
Step 4: Draw the Bottom Layer
It’s time to add the last layer of the burger, just draw the inverted semi circle, that is disclosed with the patty. And draw tiny circle to illustrate the sesame seeds, on the top of the bun.
Yeah! We have almost reached the final stage of our burger drawing for kids. Let us move on to the most fun part of the tutorial.
Step 5: It’s Coloring Time
Here comes the most interesting part of our drawing tutorial! Give life to your Burger! In our reference image we have used lighter orange shade for both top and bottom bun. Green shade for lettuce, red shade for sliced tomato, a lighter yellow shade for cheese slice, and brown shade for patty.
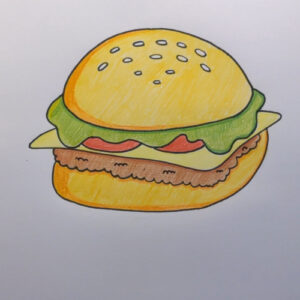
Yummy! Your burger drawing looks stunning and just like the realistic thing! We hope this blog on how to draw a burger, helps the kids to sketch the realistic image.
We made this tutorial with the goal of making it as easy as possible for you to learn and customize while still having fun with the artwork. If you still have doubt on this guide of burger drawing for kids, please watch the video tutorial given below.
Video Tutorial: How to Draw a Burger
You may enjoy plenty more amazing drawing instructions on our website and YouTube Channel! For more enjoyable sketching, we hope to meet you there.
The link is here : https://www.youtube.com/@ohparrot1121/videos