Learn How to Draw a Rose in Just 7 Easy Steps
Without a doubt, the rose represents love when it comes to flowers. Roses are beautiful to look at, yet they eventually wither away just like any other flower. Instead, how about taking a course on rose drawing? You may always enjoy a rose’s beauty up close and personal when you have a sketch of one.
Thankfully, we’ve produced a detailed guide that can be completed in just nine short and simple stages, showing you how to draw a rose. For your visual reference as you work through each step one by one, each instruction includes an example.
Let’s Get Started- How to Draw a Rose!
No matter how skilled or inexperienced you are at drawing, you can create a rose with the help of this tutorial! Draw a lovely rose with joy and your creative abilities!
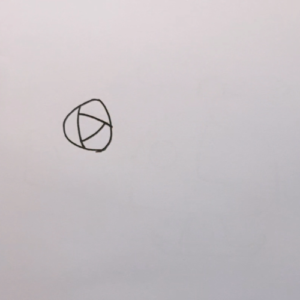
Step 1: Draw the Inner Part of the Rose
To begin this guide on how to draw a rose, we shall initiate it by drawing the inner part of the rose. Draw an irregular triangle to form the inner part. We shall add petals in the upcoming steps.

Step 2: Now, Draw the Innermost Part
In this step, draw three lines inside the triangle as we drew in the previous step because a rose has plenty of inner layers.
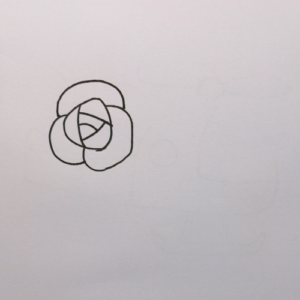
Step 3: Add the Next Layer of Petals
Next, you will sketch the next layer of petals surrounded by the inner petal part of the rose. So, I like to connect these petals with the smallest circle from the previous step so everything flows nicely. And this would be our first set of petals.
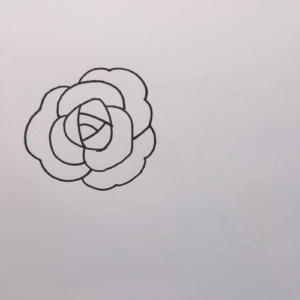
Step 4: Add More Outer Petals
In this step, you can use some creativity to create four layers for your rose, which remain intact as the inner petals but will also give the flower body. Just draw curving lines on the left and right sides of the rose. Followed by a small outer petal with a few bumps and a semicircle on the underside of the flower.
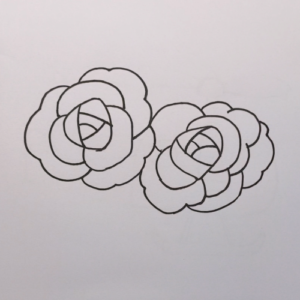
Step 5: Sketch Another Rose
In this drawing tutorial, we will sketch two roses. One rose drawing is completed, so it’s time to add one another. For this, you need to repeat all these above-given steps to sketch the second rose. Followed by a small outer petal with a few bumps and a semicircle on the underside of the flower. We shall add other features of roses in the next step.
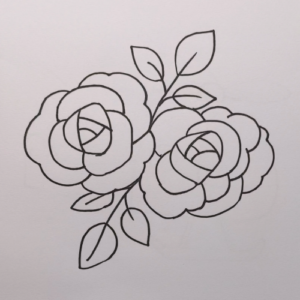
Step 6: Add Stem and Leaves
Now it’s time to add the stem and leaves of the rose. I think, this is also an easy step. Simply draw a long single curved line inbeteen the gap of the two roses.
Now, draw veins and three leaves on the top and bottom of the stem. Great! Here you have almost completed the outline for the rose.
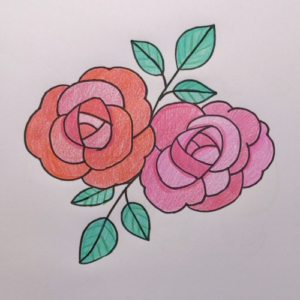
Step 7: Finish Off Your Cute Rose Drawing With Some Colors!
There you have it- You have successfully completed this tutorial on how to draw a rose! This is an ideal time to add some color to your gorgeous rose!
The previous instance demonstrates shows, we used the red, and pink shades for the petals and green for the leaves—a classic color combination for a rose! Also, add some extra detailing features like veins on the leaves, with a darker green shade.
With this step-by-step rose sketching instruction, hopefully you enjoyed fun while drawing. It’s a simple sketch of a rose! Hang it in your house or place it on a handcrafted card for a unique and thoughtful present.
This lovely flower is also enjoyable to give away. You drew it, so brag! You should be able to draw a beautiful rose with the help of this how to draw a rose, tutorial.
Video Tutorial: How To Draw a Rose
You may enjoy plenty more amazing drawing instructions on our website and YouTube Channel!
The link is here : https://www.youtube.com/@ohparrot1121/videos