Watermelon Drawing for Kids in 5 Easy Guidelines
Hello, young artist! The initial brushstroke in this lovely creative journey suggests our viewers satisfying curvature with unique art. This first step is essential because it creates the illusion of a watermelon ready to be cut and shared. Every stage in learning how to draw a watermelon aims to elevate the ordinary to the incredible.
Imagine a juicy watermelon with its lovely fragrance flowing through the air as you look into this image. A circle, which is the ideal of simplicity, is captured in the first few strokes. Our Watermelon drawing for kids, will appear in all its beauty across this drawing. Understanding a watermelon’s basic forms and lines is essential to drawing one.
Let’s Get Started- Watermelon Drawing for Kids
Here are the 5 simple steps to be followed to great outcome of Watermelon drawing for kids.
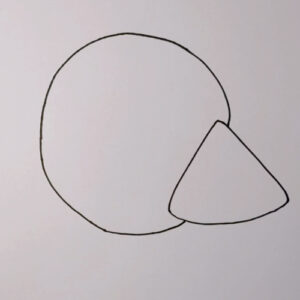
Step 1: Draw a Slice and Full Watermelon
To get started, sketch a triangle with a rounded base. This outline forms the watermelon slice’s shape. We are going to sketch a whole watermelon as part of our sketching. Now let’s go ahead and do it!
Draw a large, nearly circular curve on the slice’s left side. Details will be added later. Excellent work!
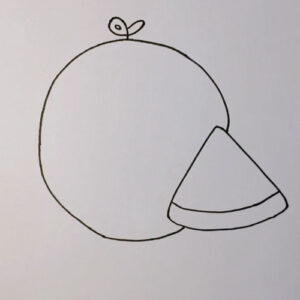
Step 2: Add the Bottom Layer and Stem of the Watermelon
In this step, draw a curved line near the edge of the bottom curved line. So, it illustrates the bottom green layer of the watermelon slice. Though it is closer to the skin, the little layer of fleshy fruit is bright green rather than the light pink of the rest of the slice.
Between the two curves, leave a space of approximately one centimeter. Next, add the stem on the top of the watermelon, because they are attached to the main plant by stems when first harvesting, watermelons also have stems! Create a little curl on the curve you just made. The melon will be covered in more detail in the following stage.
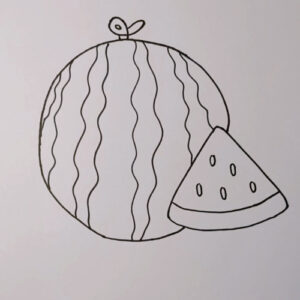
Step 3: Draw Markings on the Big Watermelon and Add Some Seeds
Ever notice the beautiful stripes on a watermelon when you look at it closely? On most watermelons, the skin is filled with a variety of colors including green.
Hence, we would also like to include it in our melon. Make curving vertical lines all over the melon. Look for a spherical appearance in our design by making them resemble the general form of the watermelon. To see what we mean, look at the picture! Don’t worry about perfection, just make as many as you think look nice! well done!
Seeds are always present in watermelons. The rinds and seeds of watermelons are edible, as you may have guessed. Let us now sketch the little seeds. For the seeds, place a few little circles throughout the triangular shape, about spaced apart on the slice.
Step 4: Color the Main Part of the Watermelon
In this guide on Watermelon drawing for kids, we shall fill the main area of the watermelon with a lighter green shade. In the next step, we shall fill the remaining area.
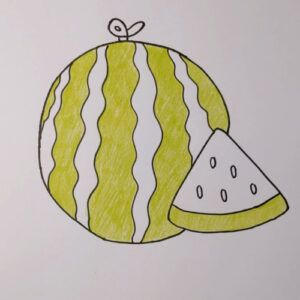
Step 5: Finish Off Watermelon Drawing With Some Vibrant Color
This step is always the favorite part for kids! Usually, watermelon appears with a reddish pink with a green skin. Now, we shall fill the stripes with darker green shades, brown shade for the stem and bright red color for the inner fruit. Also, fill the seed with black shade.
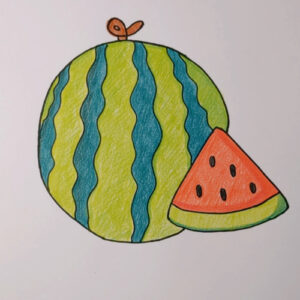
Good Job! You have successfully finished the Watermelon drawing for kids!
Video Tutorial: Watermelon drawing for kids
You may enjoy plenty more amazing drawing instructions on our website and YouTube Channel! For more enjoyable sketching, we hope to meet you there.
The link is here : https://www.youtube.com/@ohparrot1121/videos

