Colorful Butterfly Drawing for Kids
Hi, Dear art enthusiasts
This time, we are going to draw a Colorful Butterfly for Kids, which is very easy and will surely bring some happiness to children. As you know, butterflies are one of the brightest insects that we can observe in nature. Their wings are decorated with all sorts of patterns and colors, making them excellent subjects for drawings.
This guide is quite suitable for beginners because the process of creating the drawing is very easy to complete. First, you will need to outline your future butterfly, then add some details and finish the picture with coloring.
As for the tools I used for my Butterfly Drawing, I used a Sharpie marker and acrylic markers, but you may also use any materials you prefer from the list given below.
So, it is high time we started our fun journey into the world of drawing!
Required Materials
Sharpie Marker
Acrylic Markers
Drawing Paper
You may also use crayons, sketch pens, colored pencils, or anything you like from your coloring supplies.
Amazing Butterfly Fact 🦋
Did You Know?
Butterflies taste using their feet. When they land on a flower or plant, tiny sensory organs located in their feet help them locate their source of nutrition. The butterflies can discover which plants they should feed upon with their unique ability to sense through their feet.
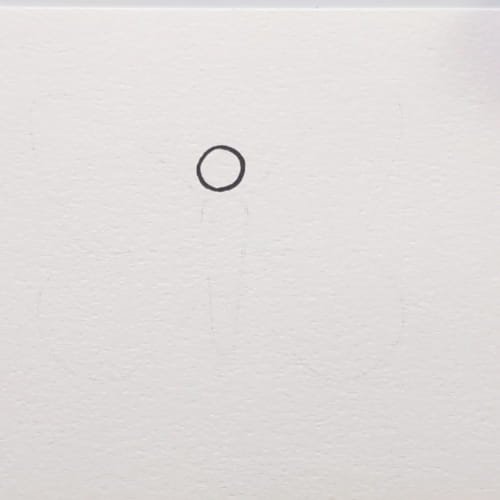
Step 1: Outline the Butterfly’s Head
Start by creating a small circle at the top of your paper. The circle will form the head of the butterfly you are drawing. Don’t forget about proportion while making the head. It should not be too large compared to the body.
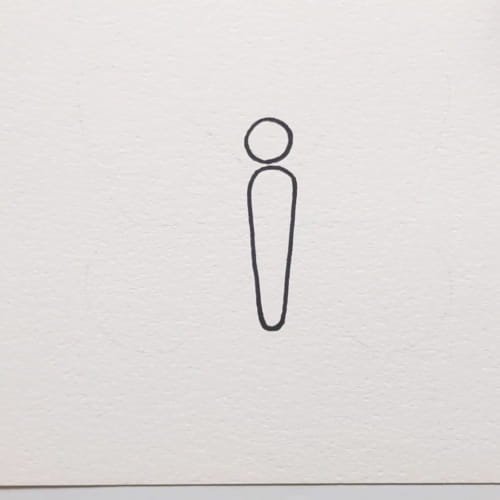
Step 2: Outline the Body
Add a slender body below the butterfly’s head. The body can be elongated and gradually become thinner moving down from the head of the insect. The outline of the butterfly’s body can still look very simple but will help build your drawing later.

Step 3: Draw the Front Pair of Wings
Next, add wings to the front side of your butterfly. Start by outlining an upper large wing and a lower small wing. Remember that these are the butterfly’s most prominent features and should be drawn carefully.
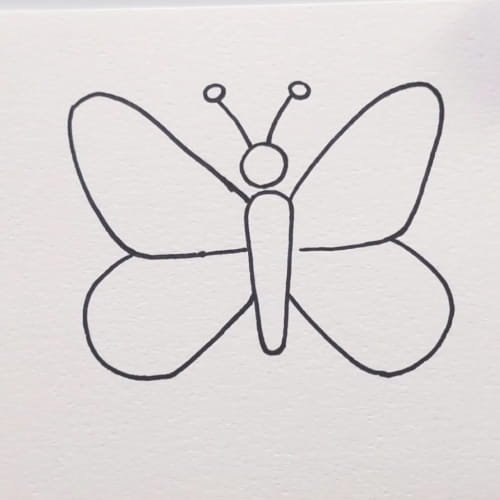
Step 4: Draw Wings & the Antennae
Create the exact wings on the other side. Remember that butterfly wings are always the same in their dimensions, and you should pay attention to the detail to create a nice picture. Draw two antennae over the head of the butterfly. Put small circles over each antenna end. It will add a realistic touch to your butterfly drawing.
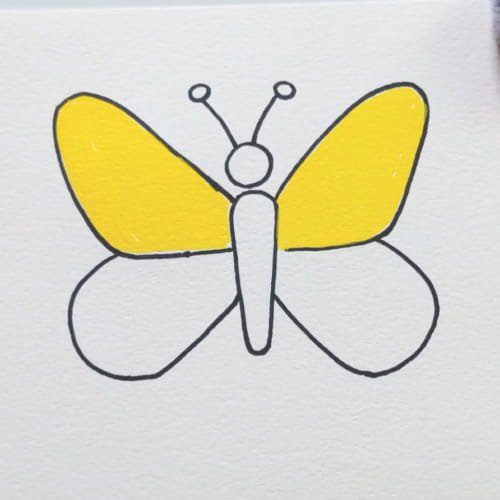
Step 5: Start Coloring the Upper Part of the Butterfly
Pick a bright yellow marker and paint all the wings on the top of the butterfly. Now, pick a pink marker and color the bottom part of the wings. Such bright and cheerful colors will be a great idea for the beautiful butterfly picture.
Do not hesitate to play with colors and come up with something unique.
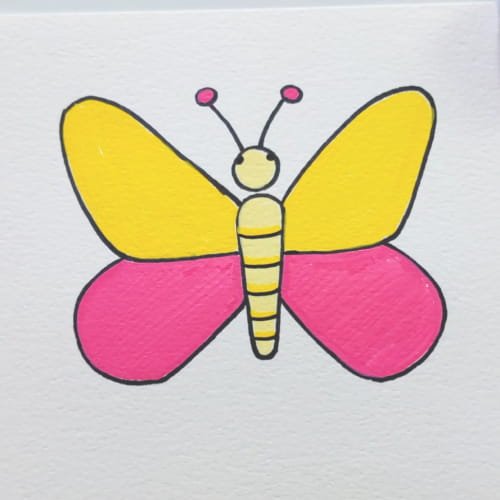
Step 6: Color the Head and Body
Pick a light yellow marker and color the head and the body of the butterfly. After that, put several horizontal lines over the butterfly’s body to show its segments.
It would also look nice to paint the ends of antennae pink to complete coloring.
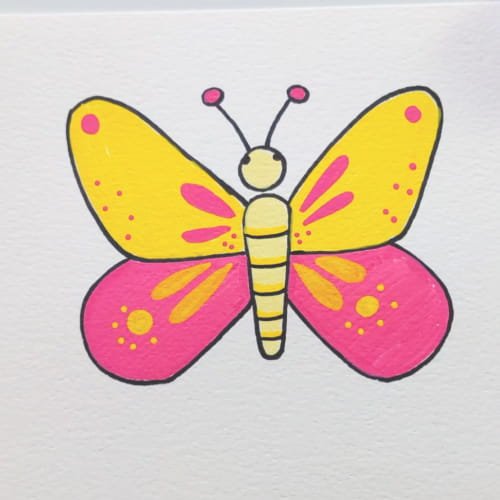
Step 7: Decoration of the Wings
It’s time to be the most creative now by putting some dots, lines, and simple shapes all over the wings. The decorative pattern will give uniqueness to each of your butterflies as there are no two identical ones.
Draw pink dots on the yellow wings and yellow dots on the pink wings for an attractive design. After the decoration process, your butterfly is ready.
Congrats! Your creation is beautiful and colored in bright colors.
Conclusion
In conclusion, we hope you had a great time drawing your own Cute Butterfly Drawing for Kids. Using just a few steps, you managed to create a very cute butterfly.
Practice your drawing skills more and more by making your butterflies look differently in terms of color or shape combinations.
If you liked today’s Drawing, don’t stop here! We have lots more simple drawing lessons for kids for you. Check out : Bee Drawing in 7 Easy Steps for Kids Blog if you are a beginner or new here.
Watch More Kids’ Drawing and Coloring Videos on YouTube
Check out our YouTube channel for more easy-to-follow drawing and coloring tutorials for kids : https://www.youtube.com/@ohparrot1121/videos
FAQ’s about Butterfly Drawing
How to Make your Butterfly Drawing Colorful?
Use various colors and fun patterns in order to create a colorful and unique Butterfly Drawing.
Is Butterfly Drawing appropriate for beginners?
Definitely. This Butterfly Drawing is quite simple for beginners as it is created using simple shapes and easy-to-understand instructions.
Which colors can I use for a Butterfly Drawing?
Yellow, pink, blue, purple, orange – you may use any colors. You should remember that there are a lot of color combinations on butterfly wings.
How to Make a Butterfly Drawing More Creative?
Use various elements such as dots, swirls, hearts, stars or different wing patterns in order to make your Butterfly Drawing more unusual.
Which Method of Butterfly Drawing Is Easy and Suitable for Beginners?
Draw head and body at first, and then simply create two identical wings for the body on each side. At last, fill in butterfly drawing with colors.
Are Children Able to Draw this Butterfly?
Certainly. It is the simplest butterfly drawing for kids which can be easily drawn by little artists.
Why Do Butterflies Have Colorful Wings?
These creatures are protected by beautiful wing patterns which also serve for communication and attraction.
What