
How about a howling wolf today? We will create a Wolf Drawing step by step with this funny drawing tutorial using soft shapes and simple lines. Wolves are amazing smart and mighty animals. They are also great objects for drawing since it is not hard to draw them from scratch step by step gradually.
In this Wolf Drawing, we will start with a head of the wolf. Then we will move further and draw the neck, the body, legs, and a tail. Finally, we will make our drawing much more interesting adding a moon and some earth beneath our wolf. This way, we will get a complete moonlit image of a howling wolf rather than a drawing of an ordinary animal.
For creating this drawing, I have used a Sharpie marker for drawing outlines and acrylic markers for coloring. However, you can use crayons, sketch pens, or colored pencils instead if you do not have those tools. The main idea here is to make our drawing easy and fun to draw for kids.
Let’s get our papers and start this cute Wolf Drawing.
Required Materials
Sharpie marker
Acrylic markers
Drawing paper
Optionally: crayons, sketch pens, or colored pencils
Fun Fact
Wolves howl to communicate with each other. Howling helps them communicate with their packmates by informing them of their position and warning them not to approach.
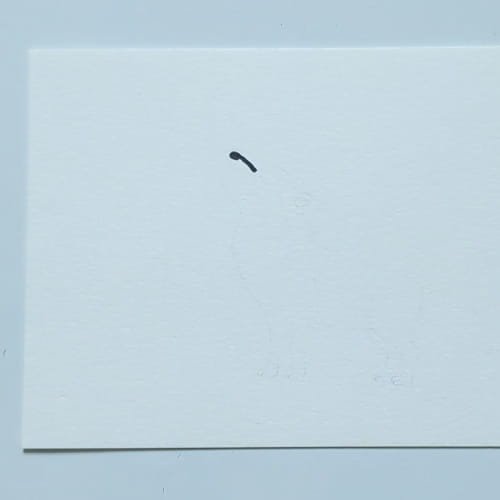

Step 1 : Draw the Top Head Curve
Now let’s start our Wolf Drawing by creating a short and slightly curved line which will represent the top of the head.
This step is just a tiny one and it won’t do anything other than help you position the wolf’s face correctly.
As we already know that the wolf is going to howl, then the head should be tilted upwards in your drawing.
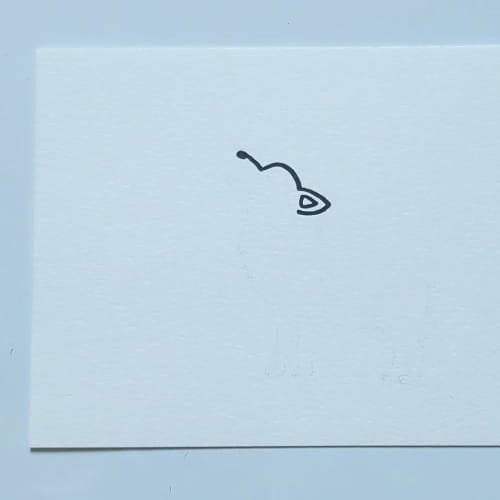
Step 2 : Complete the Ear and Head Shape
In this step we’ll complete the head of the wolf by adding one pointy ear at its side.
This will complete the upward-facing posture of the wolf in your drawing and now you can see why the ear had to be pointy.
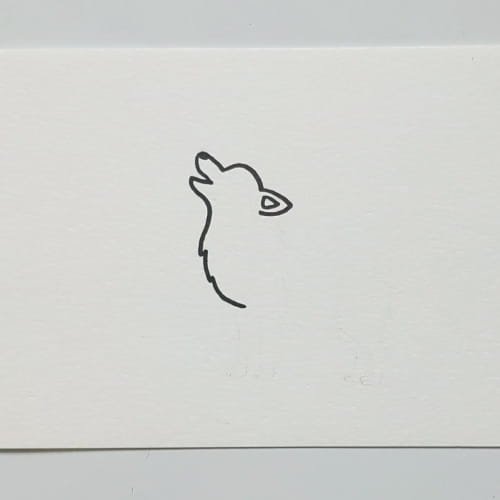
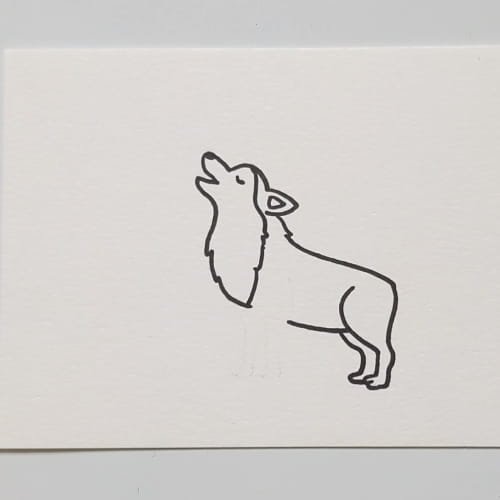
Step 3: Adding the face and furry neck of your Wolf Drawing
After that, you have to draw the open mouth and the nose area of the wolf drawing. Now drag the line to form the furry neck and chest of the wolf. Use jagged lines instead of straight lines for the fur part.
This is where your Wolf Drawing gets exciting because of the raised head and furry neck. It looks as if the wolf is howling to the moon.
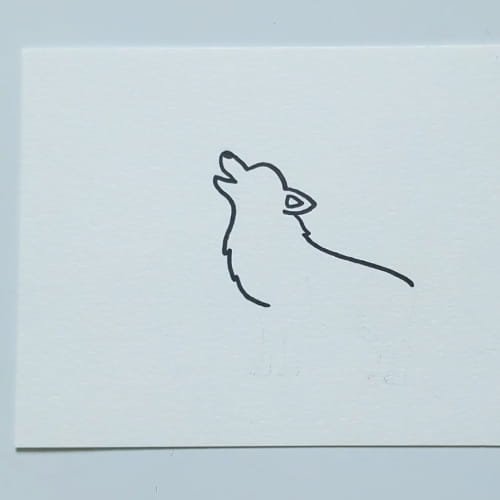
Step 4: Extending the back line of the Wolf Drawing
Draw the curved back line from the back of the head till you reach towards the right of your paper to give shape to the back of the wolf. Make sure the line is not very curvy and it has to be slanted.
Since this step is important in giving shape to the entire body, draw it very carefully. At this point of your Wolf Drawing, it will appear as if you are drawing the front half of a standing wolf.
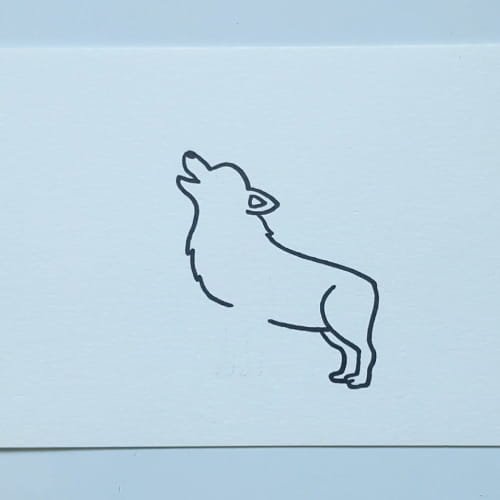
Step 5: Draw body curvature and back legs for your Wolf Drawing
In this step, you will need to draw the back leg area and draw the curvature of the body downwards. Finally, add small paws to the hind legs.
This will make the Wolf Drawing stable on the ground. Now, the body form of your wolf is almost formed and you can get an idea about the posture of the animal.
Step 6: Finish the Wolf Drawing with front legs and tail
Finally, draw the front legs from the chest part and then draw the long fluffy tail of the animal that stretches from its body.
Now your Wolf Drawing is complete. You got the head, chest, legs, body, and tail of the animal in one piece.
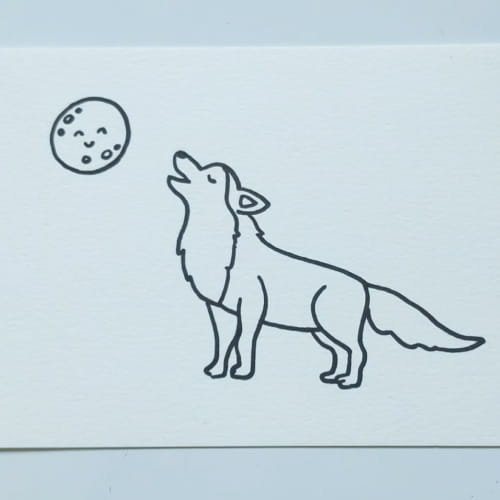
Step 7: Draw the Moon in Your Wolf Drawing
In order to make the image more magical, draw a round moon in the sky above the wolf. Draw some crater spots on the moon along with a cute little face.
This simple addition transforms the whole image from just an animal drawing to a complete night scene. This step also helps bring life into your Wolf Drawing.
Step 8: Color Your Wolf Drawing
The time has come to color the wolf. Light grey, blue-grey or silver are all perfect colors for the body of the wolf. The body of the wolf should be colored with lighter shades in order to highlight the chest part.
Cool tones of colors are very effective for this stage because it adds more mystery to the nighttime environment.
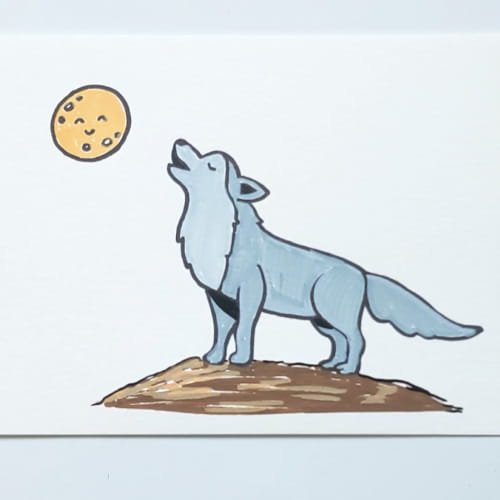
Step 9: Complete your Wolf Drawing with ground and other details
In order to complete your Wolf Drawing, you need to put some patches of brown ground beneath the feet of the wolf. After that, you can also paint the moon using yellow or pale orange colors. If you wish, you can add shading to the body of the wolf as well.
This step completes the entire drawing and now your wolf is not just floating on paper but has come to life standing beneath the moon to howl.
Why children like learning from Wolf Drawing tutorials
What makes this Wolf Drawing lesson entertaining is its combination of an animal drawing with a small night landscape. Children are not only drawing the animal itself but also are given a chance to include the moon, the ground, and the howling position into their artwork.
Moreover, this particular drawing can serve as an excellent practice drawing due to its smooth body lines, simple legs, and easy coloring zones. This makes it a perfect choice for those who would like to learn drawing animals but have no experience with them yet.
Conclusion
We hope you liked drawing the cutest Wolf Drawing using step-by-step instructions. By starting with the head and gradually drawing the neck, body, tail, and moon you managed to create an adorable night-time wolf landscape.
Feel free to experiment with your Wolf Drawing further by including such elements as stars, trees, grass, or even another wolf character into the background of your work.
If you liked our lesson, don’t stop here! We have lots more simple drawing lessons for kids for you. Check out : Cute Hammerhead Shark Drawing for Kids Blog if you are a beginner or new here.
Watch More Kids’ Drawing and Coloring Videos on YouTube
Check out our YouTube channel for more easy-to-follow drawing and coloring tutorials for kids : https://www.youtube.com/@ohparrot1121/videos