The Tulip Drawing for Kids is a cute flower activity which is suitable for little artists. Tulips are one of the easiest flowers to be drawn since they have the softest shape of a bud, straight stem and two leaf stalks. So, they can be perfect for those who are only learning how to draw flowers.
This tutorial will help to draw a nice pink tulip flower from one curved line which you will turn into a flower step-by-step. Also, there are going to be green leaves and several small details added and some sparkle elements surrounding the flower. If you like flower drawings and want your kid to learn how to draw them, this one would be a good choice, as the shapes are clean and easy.
Tulip Drawing for Kids: A Tiny Flower Fact
Tulips are favorite spring flowers which develop from bulbs and can be found in many colors such as pink, red, yellow, orange, purple and white. Usually, a cup shaped flower head with smooth petals and long green leaves is characteristic for most tulips. That is why they are ideal for learning how to draw flowers.
Required Materials
- Sharpie
- Acrylic markers
- Drawing sheet
- Optional materials – Crayons, Sketch pens, Color pencils
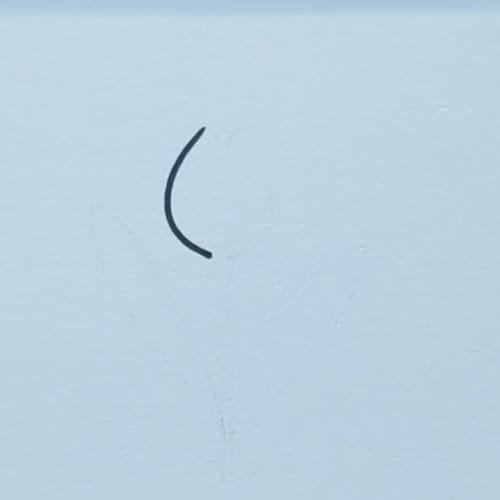
Step 1: Draw one curved petal line for starting the Tulip Drawing for Kids
To start your Tulip Drawing for Kids, draw one curved line. It will form the first side of the tulip flower. Make the line smooth and tall to have an attractive appearance of the flower bud.
It may seem to you that this first stroke is simple, but it is the foundation for the flower. You should try not to draw a thick line. Tulips mostly have narrow flowers, so you can use a soft curved line for drawing it.
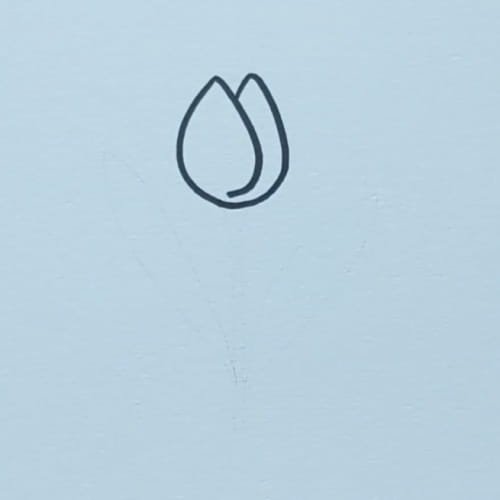
Step 2: Transform the curved line into the tulip bud
Draw the second petal of the tulip bud now. For this purpose, you need to draw another curved line next to the first one and close the flower. Also, draw the inner curved petal line.
Now your flower has to resemble the tulip bud. It should have a rounded top with an opening at its top and a narrow bottom for connecting the stem.
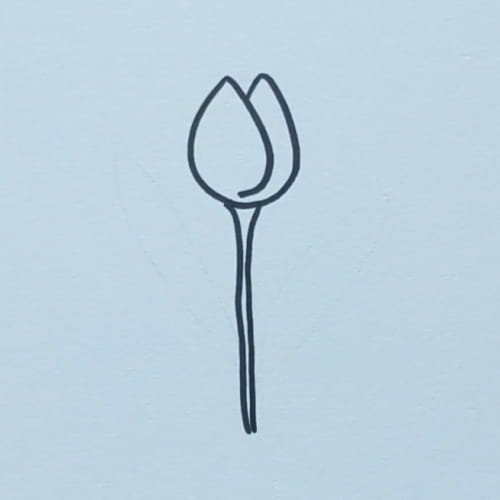
Step 3: Draw a long straight stem under the tulip
Starting from the base of the tulip bud, draw two straight lines downwards to create the stem. Make sure the stem is long and slender. Since tulips have rather plain stems, drawing them is a simple task for children.
Make sure the two stem lines run parallel to each other to ensure proper balance of the flower. By completing this step, the tulip will start to look like a flower even without leaves drawn yet.
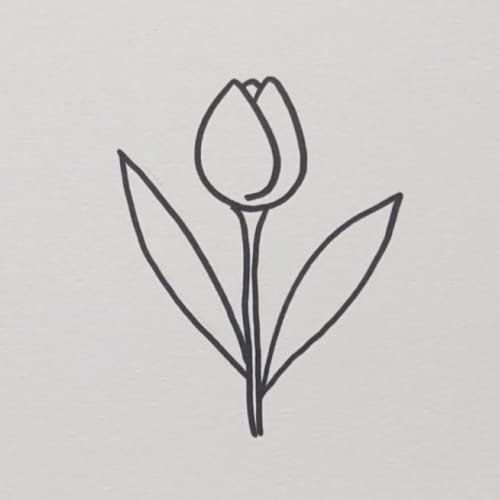
Step 4: Draw two long leaves to the Tulip Drawing for Kids
Now, draw one long leaf with a point on the left side of the stem and one similar leaf on the right side. They should be curving slightly and tall, with more length than width. Let them grow outward and surround the flower nicely.
This completes the Tulip Drawing for Kids to become more realistic. Leaves of tulips are plain enough to not require any additional detailing to be done.
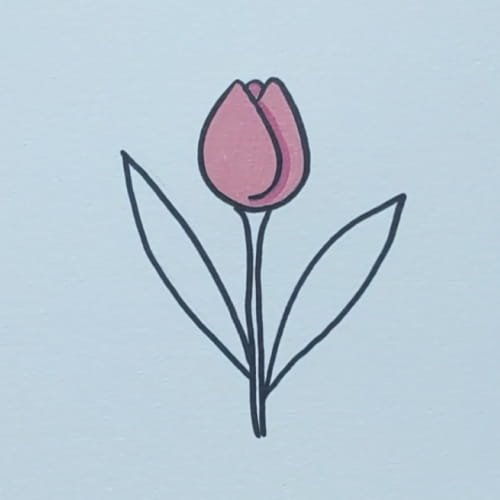
Step 5: Color the flower of your tulip in a lovely pink color
It’s time to move on to coloring the flower of your tulip. Pick a soft pink color and paint the flower bud with it. It can be all colored evenly or you may make one half darker than the other if you prefer shading the image.
In your image, at this point, only the flower is colored, while leaves and stem are still white. It makes this step easier for children because they don’t have to worry about anything except the flower bud for now. A pink color immediately makes your picture look cute and joyful.
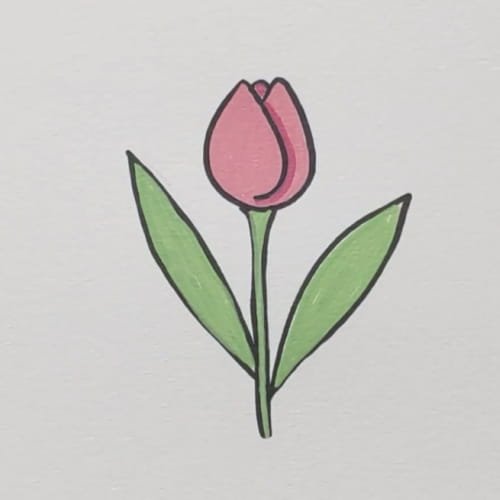
Step 6: Color the stem and leaves in green
After you finish with the flower, color the stem and both leaves in a fresh green color. Try to stay within the lines while coloring. You may use a light green color for the leaf and a bit darker green for the stem if you want some variety.
Your Tulip Drawing for Kids is now a fully-fledged flower.
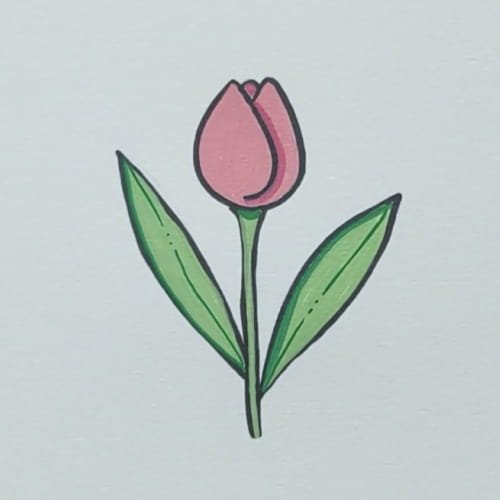
Step 7: Add small details on the leaves and tidy up colors
This step includes adding some tiny details that will slightly improve your tulip drawing. Make a small line on the center of each leaf and put a few small dots if you need to create a pattern that resembles the frame.
This is a small step but an important one as it will give your tulip a neat look. This flower is already drawn in both form and colors, so now we are going to add just some finishing details to it.
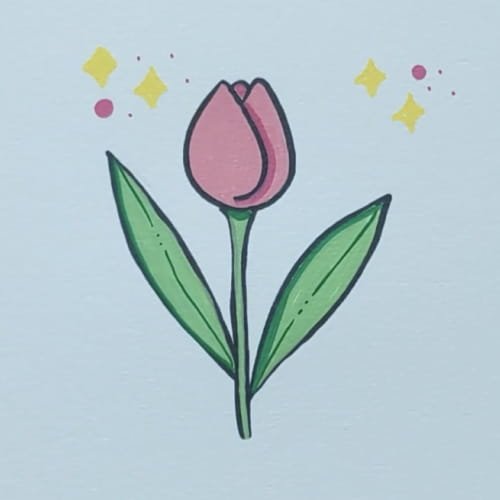
Step 8: Complete your Tulip Drawing for Kids with sparkles around it
In this step, you should draw sparkles around the flower. Add several yellow sparkle shapes and some pink dots around your tulip. Such details will make your work much brighter and cuter but still not complicated.
It is a great way to finish your drawing as children are able to play with it. Now your Tulip Drawing for Kids is completely done and looks very bright and cute.
Conclusion
The Tulip Drawing for Kids is an easy and relaxing flower drawing that beginners will love from beginning to end. With the help of drawing just one petal at first and gradually building the flower structure, stem, leaves, coloring, and sparkling, kids will be able to draw a pretty flower without being stressed out.
If your kid likes to draw the flower shown here, he/she may try to draw more tulips but use other colors such as red, yellow, purple, or orange. It would also be fun to draw a garden of tulips using the same easy method.
If you liked our Tulip Drawing for Kids lesson, don’t stop here! We have lots more simple drawing lessons for kids for you. Check out : Cute Wolf Drawing for Kids Blog if you are a beginner or new here.
Watch More Kids’ Drawing and Coloring Videos on YouTube
Check out our YouTube channel for more easy-to-follow drawing and coloring tutorials for kids : https://www.youtube.com/@ohparrot1121/videos