Hello, little artists!
In today’s lesson, we’ll see how to draw a charming Fairy in just 10 easy steps. Fairy is a tiny creature from storybooks and fairytales that often features sparkling wings, magic wands, and loving nature.
This drawing lesson will be perfect for beginner artists since we’ll be using only simple shapes and lines to create our illustration. Follow my instructions and enjoy creating your very own fairy.
To create our picture, I’ve chosen to use a Sharpie marker and acrylic markers. However, feel free to choose any material you like; from pencils to sketch pens.
Let’s begin our journey of ‘Fairy Drawing’ in very simple steps…
Knowledge Chunk 🧚
Did You Know?
According to fairytales, most of these tiny beings are magical helpers, who guard flowers and animals in forests. Each country has its own legends about fairies, hence they may vary widely throughout the globe.

Step 1: Draw the Face of Our Fairy
Our first step is to draw a simple outline of a face shape. Two tiny ears and two short lines underneath are the neck. ( We will be creating alphabets such as ‘U’ for the face outline, two small ‘C’s on both the sides of the face outline)

Step 2: Draw the Fairy’s Hair
Add wavy lines to make her hair, which should be loose and light. Curving lines will make our fairy friend look cheerful and cute.

Step 3: Draw the Upper Body
Under the neck, depict the upper body of the dress. Add simple lines for the shoulders, and continue the outline of the bodice to create the upper part of the fairy’s dress.

Step 4: Draw the Dress
Now finish the dress by extending it outward and adding flowing lines for the skirt. Make sure that it looks comfortable and lightweight enough to move while flying.
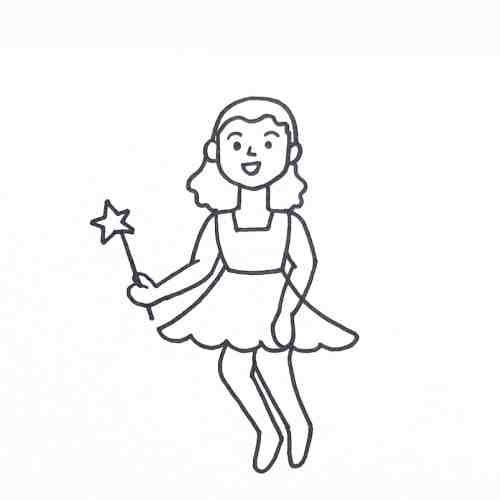
Step 5: Draw the Fairy’s Arms, Legs, and Wand
To finish the body, draw the arms on the sides and two slender legs under the dress. One arm will hold a magic wand with a star at its end.
Step 6: Add Wings and Sparkling Details
In order to complete the picture, behind the fairy’s figure, draw two big wings and add several sparkles near her body.

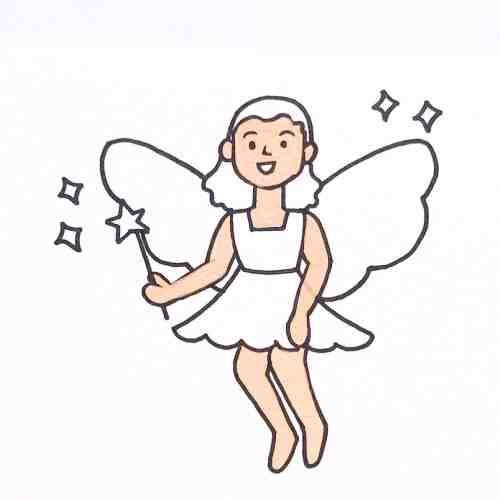
Step 7: Color the Skin Tone
Using a light pink or light beige, color the fairy’s skin on her face, neck, and limbs. Choose one of these colors, depending on your preference.

Step 8: Color the Hair
For the fairy’s hair, use any shade of brown, black, blonde, or even a fantasy hair color, whichever you prefer.
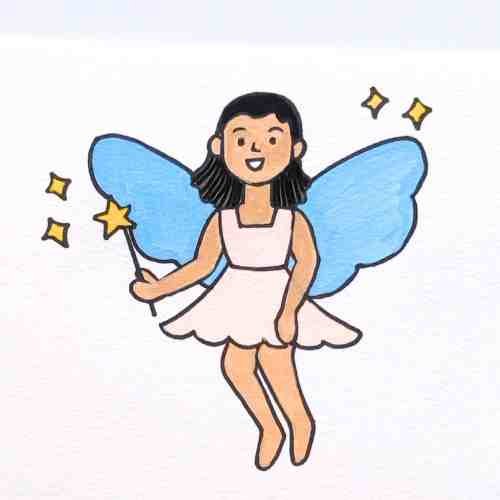
Step 9: Color the Fairy Wings
The last detail to be colored is the fairy’s wings. You can choose any shade of color, however blue creates the best effect, especially when combined with the sparkles.
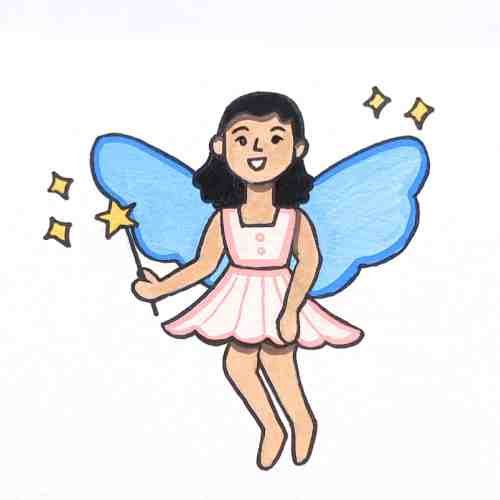
Step 10: Add Final Touches and Complete Your Drawing
Finish the drawing by coloring the fairy’s dress and magic wand in the desired shade, adding yellow highlights for the star.
Congratulations! Now you know how to draw a fairy step-by-step.
Conclusion
We hope that our instructions on how to draw a Fairy in 10 Easy Steps for Kids have been helpful and entertaining for you. With the help of simple shapes, you’ve created an amazing fairy, decorated with wings, a magic wand, and even smiles!
Keep working on your art skills and coloring your drawings with your imagination.
If you liked our Fairy Drawing for Kids lesson, don’t stop here! We have lots more simple drawing lessons for kids for you. Check out : Dragon Drawing in 8 Easy Steps for Kids Blog if you are a beginner or new here.
Watch More Kids’ Drawing and Coloring Videos on YouTube
Check out our YouTube channel for more easy-to-follow drawing and coloring tutorials for kids : https://www.youtube.com/@ohparrot1121/videos
Frequently Asked Questions :
How do you draw Fairy Drawing for kids?
The face, hair, body parts, clothing, and accessories will be drawn first before coloring. Complete your cute Fairy Drawing using vibrant colors!
Is it a beginner-friendly Easy Fairy Drawing?
Yes, this Easy Fairy Drawing can be done by beginners or kids who are learning how to draw.
What colors should I use for this Cute Fairy Drawing?
You are free to choose the color combinations you want. Some people prefer blue-colored wings while some opt for pink-colored dresses or golden stars. The color of her hair may vary as well.
What materials should I prepare for this Fairy Drawing?
For the sample drawing, Sharpie marker and acrylic markers were used. You can also use the materials you currently have at home such as sketch pens, pencils, crayons, and colored pencils.
Are there any ways I can add my own touches to this Fairy Drawing?
Yes, you can design additional decorations or background for your fairy character.