
Do you want to learn how to draw a trophy? In this easy Trophy Drawing guide, you will see all the steps needed to create an awesome trophy drawing for kids and adults. A trophy drawing is very interesting since it may symbolize a victory, hard work, challenge completion, and good performance.
In this Trophy Drawing guide, you will start drawing from the cup, then you will move on and complete the rim, base, stand, and two handles that are situated on the sides of the trophy. Once the outline of the trophy is ready, you will need to color it using golden yellow and brown colors.
The guide is very simple and uses only basic shapes, so there is nothing complicated here. I used a Sharpie marker to make the black outline and acrylic markers to color the trophy. However, if you have some crayons or other coloring materials available, you may use them instead.
Let’s start this Trophy Drawing now.
Required Materials
- Sharpie
- Acrylic markers
- Drawing sheet
- Optional materials – Crayons, Sketch pens, Color pencils
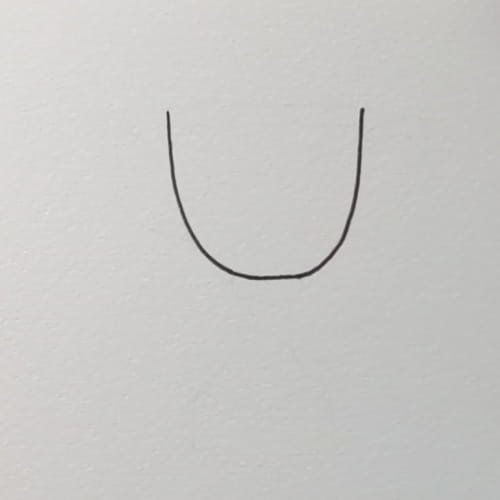

Step 1: Begin your Trophy Drawing with the cup shape
Let’s start drawing the Trophy Drawing with the main cup shape. Draw two long curves coming down from the top and complete the cup with another curve. It should resemble the letter “U”.
This is the main part of the trophy. Try to make both sides of the cup look symmetrical. The cup does not have to be perfectly shaped; however, it should look wide at the top and rounded at the bottom.
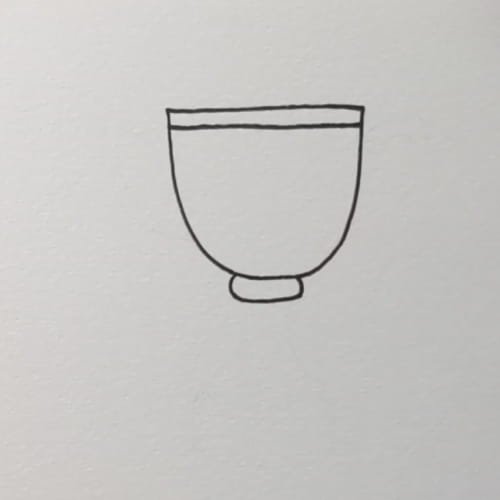
Step 2: Complete the upper rim and a little bottom stand of your Trophy Drawing
To complete the cup shape, you need to draw a straight line at its top. Also, add another line right underneath to give the cup a rim. Finally, add a small oval-shaped element underneath the cup to form a stand.
These elements will give the Trophy Drawing an appearance of a real trophy because there is a rim at the top and a connection point between the cup and the stand.
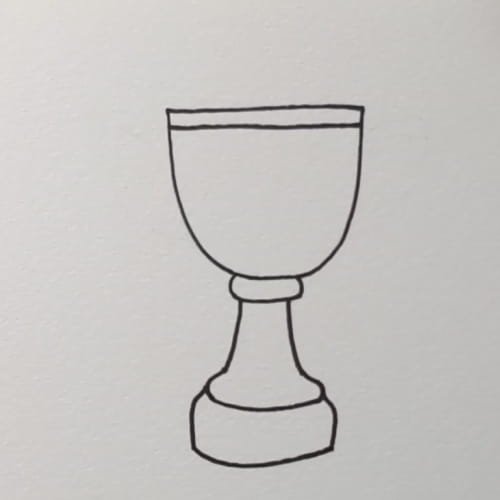
Step 3: Drawing the neck and base of the Trophy Drawing
Draw two curved lines from the small shape under the cup to form the neck of the trophy. Then draw a larger base beneath it which looks sturdy enough to support the trophy.
This step is crucial for giving Trophy Drawing its trophy shape as there will be the cup above and a stand below giving it the look of an award trophy.

Step 4: Draw the handles of your Trophy Drawing
Now draw the handles on the left and right sides of the trophy cup. Make each handle by drawing a curve beginning on the upper side of the cup and then bending to the center.
The handles are the most significant feature in a classical Trophy Drawing so you have to spend time on them to ensure that both sides look similar.

Step 5: Paint your Trophy Drawing using bright golden hues
It is now time to breathe some life into your Trophy Drawing through coloring. Color the trophy cup, handles, and top stand using bright yellow or golden yellow tones. Next, paint the base dark brown to make it look like a real trophy stand. You may also include a slightly shiny effect by adding a thin orange-yellow line on the sides of the cup or stand.
By now, your trophy looks fully done and attractive. Using such a simple yet colorful combination of yellow and brown, the Trophy Drawing looks vibrant, happy, and prize-worthy without being overly difficult to color for kids.

Step 6: Draw confetti and details to complete the Trophy Drawing
In order to decorate the Trophy Drawing and make it look more celebratory, draw tiny confetti pieces around the trophy. You may use small squares, dots or sparkles with a variety of colors, including blue, red and yellow. It will turn the picture into a festive masterpiece.
You may also include several light highlights to enhance your Trophy Drawing if needed.
Why do kids like Trophy Drawing lessons?
It is so interesting to draw a Trophy since it is an uncomplicated lesson, it looks fun and is full of joyful atmosphere. A trophy can be imagined as a reward to a child for participating in a race, football game, at school and as an artist.
In addition, it is a perfect drawing lesson for beginners, as it consists of simple components – a cup, stand, base and handles. There are no small details which have to be drawn carefully, and a child should only concentrate on shapes, outlines and coloring.
Conclusion
We hope that you enjoyed drawing the Trophy step by step. Starting with the outline of the cup and gradually drawing the rest parts – stand, base, handles and coloring – you made a bright reward drawing in a very easy manner.
Do not forget to draw your Trophy drawing and add some stars, confetti, sign of number one and even a ribbon of a winner. Every drawing is always more attractive if you add some touches of your imagination.
If you liked our Trophy Drawing for Kids lesson, don’t stop here! We have lots more simple drawing lessons for kids for you. Check out : Cute Sea Turtle Drawing for Kids Blog if you are a beginner or new here.
Watch More Kids’ Drawing and Coloring Videos on YouTube
Check out our YouTube channel for more easy-to-follow drawing and coloring tutorials for kids : https://www.youtube.com/@ohparrot1121/videos